If you open a file and can't make any edits, you may need to unlock your background layer. You can do this by double clicking the layer in the layer palette.
Always create a new document if you are making changes. That way if you ever want to start over again, you have an original to go back to.
Cropping an image:
Use the Marquee tool: Very Top left tool in the tool bar.
Click and drag to make your selection. Copy and paste into a new document.
To rotate or scale an image:
Go to the Edit menu at the top. Choose Transform and select either scale or rotate. You can grab the corners of the image to rotate and scale the image.
To make color corrections:
Go to the Image menu at the top. Choose Adjustments, under this menu you can choose to adjust the Brightness/Contrast, Color Balance and Hue/Saturation. Using these options you can make adjustments until you're happy with the overall color.
These are just a few helpful suggestions. If you need more Photoshop help, use the Help tools in the Help window, or take an online tutorial at the Adobe website.
Tools and tips for editing your images in Photoshop.
20 Photoshop Tips
1. Shift Key for Accuracy-When you want to keep things straight or constant, use the
Shift key. Hold Shift when drawing a line will keep it straight. Rectangles and ellipses will stay square or round. In transform, it will keep the aspect ratio. Use while dropping one image onto another and it will center.
2. Fix Blow Outs-Ensure your blown highlights don’t print paper white by reducing the output in Levels adjustment to 245 from 255.
3. Fade a Fix-If you want slightly less of your last action, go to Edit>Fade to reduce the amount without using an opacity change.
4. Cool Double Exposure-drag one image on top of another and change the blending
mode to Screen. To darken, try Multiply.
5. Pick a color from anywhere-Click on the foreground color to bring up the color picker. Then click anywhere on the picture to pic that color. Pick from anywhere on the screen by holding down the mouse button and moving the picker around. The new color will change on release.
6. Resize Smart-Use resampling choices; Bicubic Smoother for enlargements, Bicubic Sharper for reductions, Nearest Neighbor for Hard edged shapes.
7. Combine Layers-Don’t want to flatten? Highlight the top layer, select all, then Control Shift C to copy, then Control Shift V to make a new layer with all the layers merged.
8. See the Whole Image-Tab to hide panels, then Control 0 to enlarge. Double clicking the hand tool will do the same. For a black border click F several times.
9. Contrasty Images-Use the shadow/highlight tool to adjust the tones.
10. Selective Color – Make a B&W adjustment layer, click on the mask, paint with black to reveal the color beneath.
11. Quick Change Brushes (CS4)- Hold down ALT and hold right click and push or pull mouse to size your brush. Shift-ALT and hold right click to change hardness.
12. Better Contrast-Using curves to fix contrast, set blend mod to luminosity to avoid color and saturation shifts.
13. Soft Skin-On a duplicate layer, Filter>Other>Highpass radius 5. Image>Adjustments>desaturate – blend mode Softlight. This will sharpen the image, now choose Image>Adjustments>Invert for a wonderful softness. Control with a layer mask.
14. Repair Right-Before cloning make a new layer. From the pulldown menu in the options bar pick Sample>Current and Below or Sample all. Your cloning will be on this hovering layer.
15. Quick B&W- Hold Cntrl and type 1, 2, 3 to see the red green and blue channels. Like one best? Goto channel mixer and make it 100%, the others at 0, check monochrome.
16. Great Eyes-use the Lasso set slightly feathered to select the eyes. Ctrl J to copy them to a new layer. Use levels or curves and sharpen here, control with opacity.
17. Fix Color- Image>Adjustments>Variations find the best and correct using curves.
18. See your type-Ctrl H will hide your highlight on your text or hide marching ants.
19. Print Size (CS4)-Find the width of your screen in pixels divide by the width of your screen (Pixels/inch) Open Preferences>Units and Rulers and enter the value in the screen resolution field. Choose View>Print size to see your photo as it will print.
20. Best Zoom-Use Ctrl+Spacebar and draw a rectangle around your zoom area.
Makes transparent background in photoshop CS2
1. you are file open which its(the background will be made transparent
2. you are selection background like picture hereunder :

3. you are open help – export transparent image

4. you select;chooses 3 coming up choice – “ I has selected the area to made transparent”

5. next – there emerges question “ what will this image is used for?” – select;chooses “ online”
6. select;chooses format “ PNG” for good result.

7. and save - finish
Hopefully usefulRead More ..
makes website from photoshop
makes website from photoshop
its(the video here you are, safe tries.
itsthe trick is hardly easy to
and this way of making its(the web in dreamweaver
Makes album web with photoshop for beginner
Makes album web with photoshop for beginner
1. open ur photoshop
2. click : file – automate – web photo gallery
3. arranges style which you to like
4. and contents of e-mail, that you e-mail address comes up in web
5. browse source image your photograph folder
6. browse folder destination
7. arranges its(the option according to your appetite
8. and extensions which you applies HTML can or HTM, because its(the language is same
9. then clicked OK
10. having
web your gallery photo have been available in folder directory which you has determined, hopefully useful.
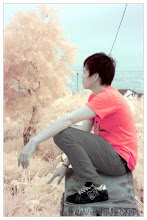
Tips usage of tool editing infra red photo
Tips usage of tool editing infra red photo
Photograph from result of camera infra red very on unique, many mans which confusion for problem process his(its digital, many people whoes at forum photography tells tool applied in photoshop only around image --> adjusment like channel mixer, selective colour, auto of level, curves, color balance, hue/saturation, etc..
Hopefully with this my postingan, you can develop it and more creatively again.
Hopefully useful.
tips easy to change background photograph
tips easy to change background photograph
1. photograph open is wishing selection you
2. applies polygonal lasso tool or magnetic lasso tool or compress L in keyboard
3. starts does selection, in the event of mistake of quit of selection or selection of line, you are compress backspace to return it.
4. after completed selection of compress V atu move tool and draws to background which you wishs.
5. having
hopefully useful
Tips makes photograph vintage / retro for beginner
1. your photograph open
2. duplicate layer by the way of CTRL + J
3. then opened CURVES / CTRL + M
4. arranges composition of colour as according to your will;desire, but channel applied only blue and red, that photograph is more having colourly vintage
5. after completed phase 4, now you are your photograph contact with grunge brush, that photograph bebercak and having nuance photograph which have been long enough.
6. save only. Having
hopefully useful
Tips makes simple frame in photoshop
1. your photograph open
2. duplicate your foto/layer by the way of CTRL + J
3. then double clicked in layer 1 ( result of duplicate)
4. after admission in layer style click inner glow
5. changes blend mode with NORMAL
6. opacity 100%
7. and element its(the choke 100%
8. then its(the size you liked you
9. click ok and having
hopefully useful
washs out of with photoshop for beginner
washs out of with photoshop for beginner
possibly plenty (of) way to clean face we are photographed, can apply healing tool, can also applies blur tool.
But sometimes we wish quickly in doing expurgation, now I am there are solution, only with a few clicked the you face in photograph thus spotless cleanness.
Its(the solution is download you 2 tool must be additional that is imagenomic noisware and imagenomic potraitue, with ke2 tool you are ga needs is hard difficultness to sweep one by one stain is face [by] you.
Hopefully useful
tips editing photograph manual infra red ( IR camera)
tips editing photograph manual infra red ( IR camera)
1. your IR photograph open
2. duplicate layer / CTRL + J
3. click Image – Adjusment – Channel mixer
4. this composition for Channel mixer – RED : red 0 green 0 blue 100 – BLUE : red 100 green 0 blue 0. OK
5. then CTRL + auto Levator Skapula and click of level, and result of his(its would like this
6. having, the rest up to you.
Hopefully useful.